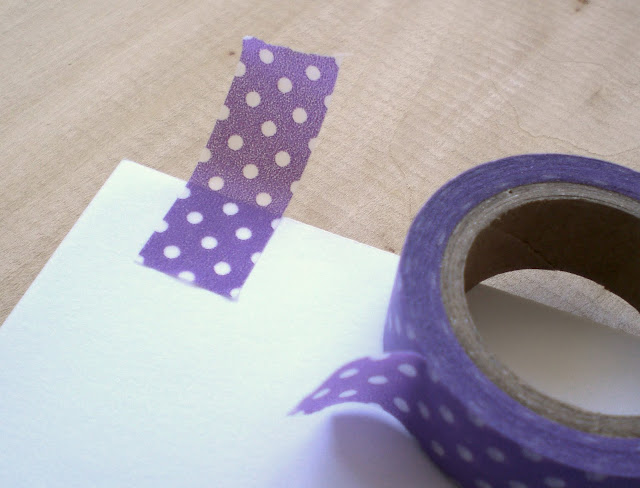
Finally got my hands on some washi tape! (Where I live they are not so easy to find).
In case you are not aware of washi tape, take a look here, there are thousands of cute things you can do with them!
Here are some ideas I came up with.
- Wrap a Pen
Super easy, go over one side of the pen with tape, then do the other side. You usually can match the pattern with the next row of tape, like this:
Cut the extra at the ends and you´re done. The tape was peeling off a bit on mine, a little dab of glue here and there will help to keep it in place.
- Mark a noteboook
Stick some tape on a page, then fold it over itself. You can even do this on books since washi tape peels off easily.
If you are marking more pages, try to match the position of the previous tape with the new one.
- Wrap a tealight candle
This was a bigger tealight, so i used 2 pieces of tape, matching the design like with the pen.
If you have extra tape hanging, make little cuts all around and stick them to the bottom of the candle.
Enjoy your "washified" objects!
23.10.13
8.10.13
22.9.13
Purple Frog Recommends - A Redtail's Dream
It always amazes me to find such beautiful, original and well written online graphic novels, many of which can be read completely free of charge.
One such marvelous webcomic is A Redtail's Dream, written and illustrated by Finnish/Swedish artist Minna Sundberg.
The story takes place in a dream world, and is infused with surrealism and Finnish mythology. We follow characters Hannu Viitanen and his faithful dog Ville in a captivating journey to escape the realm of dreams, while rescuing their fellow villagers from the machinations of a mischievous fox.
Minna is having a crowd-funding campaign to have the comic published in printed format. It is already (not surprisingly) fully funded and has reached many of the stretch goals, but you still have about a week to grab a copy of the book, along with many other related goodies. This will probably be the only print run for the story, but the comic will stay available online. It is a great chance to support the artist and show appreciation for all the effort put into it (and, of course, then you will have the beautiful book if you choose to buy it). Head on over to the campaign page to see all the details.
Thank you Minna for sharing your art with the world so generously, and best of luck with your campaign!
Labels:
art,
artist spotlight,
comics,
illustration,
purple frog recommends
31.8.13
A good tip for graphic tablet users
Have you ever noticed a mouse callus on your or a friend's hand, that indicates a little computer addiction... ? Well if you happen to be a graphics tablet user, this callus is going to be gigantic, because you don't even have the cushioning from the mouse-pad to protect your sorry wrist!
Enters: The Old Shirt Cuff!
Yup, just like that - cut the cuff off from an old shirt and you get instant wrist protection!
Ever since I did this, I can't work without it anymore! If you don't have a shirt to cut, it should be really simple to make one with any piece of fabric or felt, even without a sewing machine!
Ah! Much better! =)
23.8.13
Artist Spotlight - Lois van Baarle
There are so many amazing talented people I stalk on the interwebs, I decided to create an "Artist Spotlight" feature on the blog, so that you may also be impressed!
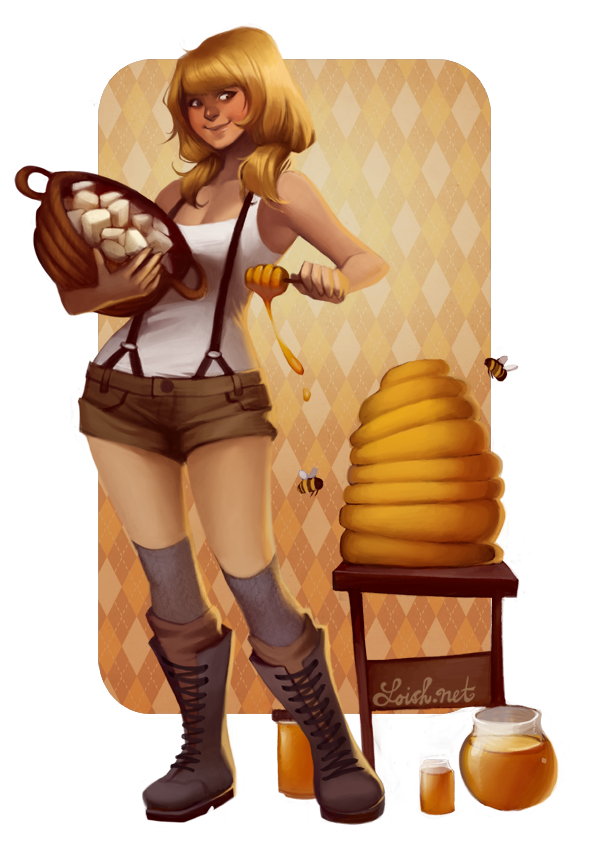
For the first of my artist spotlights, meet Lois Van Baarle, also known as Loish!
Lots of texture and vibrance, curvy girls with bubblegum-colored hair, and stylish clothes I wish I had in my wardrobe - are all part of her very unique and beautiful style!
Her pieces are very feminine and full of life! A lot of her characters look a little bit like herself, don't you think?
So go check out her website, from there you can find her art for sale, and all her social media links.
I take my leave with these pics of her art process.
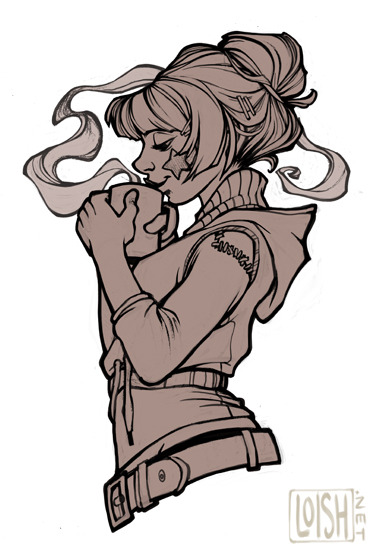

Lois, you are an inspiration!
18.8.13
Framed Oil Pastel Drawings
Remember all the artsy-crafty stuff i bought from Daiso? Well it was about time I put some of it to good use!
So I took those oil pastels (which i now think are just simple crayons... but it doesn't matter they are fun anyways!) and made this! It's really good to work on a "real life" traditional media piece for a change. It has that calming effect that the computer can't provide. It has been so long since I did something like this. Not being able to fix the mistakes easily (no ctrl+z on the paper...!) is also an exercise in letting go.
I had that little sketchbook just lying around, and it is the perfect size for the picture frames (also from Daiso).
Not perfect, but nice enough! It's interesting how mostly anything looks better in a frame, isn't it? Now I have to make another one for the other frame to have a set. I'm thinking a bunch of little blue flowers or something. We'll see.
The back of the picture frames had this interesting joining piece. Is it silly that I thought this was interesting enough to take a picture and post it here? Having no glue there is more eco friendly!
7.8.13
Purple Frog Recommends - Nexus Font Manager
Are you a designer or someone who often works with fonts? Let me recommend you this font manager.
I don't know why it took me 8 years of working with graphic design to finally think: hey, I wonder if there’s an easier way of doing this. So I went digging and it has made my font related work so much faster and simpler! I have even been varying more on my choice of fonts just because I can really see what they look like, which you cannot do properly on most programs (the font samplers are too small). There are other font managers out there, some are free and some paid for, but Nexus has everything I need so for me it works great. Here is a preview from my computer.
It has options for installing/uninstalling fonts, and apparently you don’t even need to have all those fonts installed in your computer. The site says: “while nexusfont is running, all listed fonts in NexusFont are available on other programs. Don't slow down your system by keeping hundreds of fonts installed to it”. But I don’t really use those features, what I found really useful is the tagging system. I’m a big fan of tags, since they let you organize your stuff with more than one category (as opposed to sets or files where the category is the name of the set). So for example I can have a single font tagged as “decorative,hand,slim,script” instead of just having it inside a set called “decorative” or “hand”.
Granted, it took me a whole week to organize all my fonts into the categories I created, but it was worth it! I even created a little “method” which I’m going to describe here, since someone out there might find it useful (hopefully…).
First I made 2 sets of fonts – “text” and “not text” (just a silly name to describe all the more decorative, not suitable for long reading fonts. I use these most in my work).
Then I went on to writing down all the categories I wanted to classify my “not text” fonts into. They are: angled, blackletter, bold, boxy, brushed, calligraphic, comic, cute, decorative, dingbat, distressed, fun, geometric, hand, languages, almost text, rounded, script and slim. I copied all this tags and pasted them to all my “not text” fonts, so when I organized them I was removing tags rather than adding them (I did this also because there was no way to quickly add tags just by clicking on them, you have to type them manually. Maybe something for the developers to add to a next version). I also added a tag called “uncategorized” to all the fonts, so I could stop at any time and continue the next day by turning on the filter for the “uncategorized” tag – so the program only showed those.
Next began the long process of looking at each font and deciding which tags it belonged to (or not). This was a little boring but well, it was done once and the time I save on choosing fonts now has paid off. I just have to remember to tag the new fonts when I get them. Here’s a look at what it looks like when I turn on the filter for “distressed”.
Another nice feature is the copyright and url info that appears when you select a font (bottom left corner). This makes it super easy to check if a font has commercial use allowed.
One thing worries me though, when I tried to import the Nexus settings from my pc into the laptop I didn´t manage… it says in the readme file: “NexusFont can be run in USB memory with font files in it. Even if the drive letter is changed, all library information will be maintained”. Maybe I just need to get the hang of it. Will add it here if I figure it out.
I should also say that I was not asked or endorsed to review this program, I just enjoyed it and wanted to share.
Thanks for reading, see you next time!
27.7.13
Red and Black crocheted things
Mini Pucca keychain
This tiny Pucca was made with cotton thread and a small crochet hook, 0.75 or 1.00mm if I remember well. No pattern for this one - I made it up as I went ;)
Also if you like Pucca click on wallpapers here, they have some pretty adorable ones!
Ladybug pincushion
I think this is the oldest of the three - I made it when I was still discovering amigurumis and getting into crochet again! I got the pattern online back then, but I can't find it anymore... if someone reads this and knows where it's from please tell me so I can give proper credit.
Apple Coasters
Crochet Apple Coaster Pattern
Apple
Make an adjustable ring (this will close the center so there is no hole there)
R1 - ch 2, dc 12 in the ring, sl st on the 1rst st from row - 12 st (depending on the thickness of your yarn, you can use more or fewer stitches here, just make sure the closed circle lays flat and full)
R2 - ch2, dc2 in each dc from the previous row, sl st on 1rst st from row - 24 st
R3 - c2, [dc, dc2 in the next st] until end of row, sl st on 1rst st from row- 36 st
FO
Leaf
ch5, sl st on 2nd st from hook, sc, hdc, sc, sl st
continuing on the other side of the foundation 5ch: sl st, sc, hdc, sc, sl st.
FO
Stem
ch5, sl st on 2nd st from hook, sl st 4, FO
Then just sew the leaf and stem to the apple and voila!
If you do make some apples with this pattern I would love to hear it.
16.6.13
Birds-of-Paradise
Have you ever seen these Birds-of-Paradise?
I saw some of them on TV shows, but not all of them! Check out this video, it´s truly impressive - it´s part of a project to study and document all the 39 species of birds-of-paradise. It took them 8 years. You can find more about it here: Birds-of-Paradise Project
This world we live in - so full of beauty!
 |
| Photo by Tim Laman - found on PHYS.org |
 |
| Photo by Tim Laman - found on PHYS.org |
I saw some of them on TV shows, but not all of them! Check out this video, it´s truly impressive - it´s part of a project to study and document all the 39 species of birds-of-paradise. It took them 8 years. You can find more about it here: Birds-of-Paradise Project
This world we live in - so full of beauty!
29.5.13
Looting Daiso
There was this cool Japanese store that I always liked to enter because it was full of unusual, quirky things. I didn't know that Daiso was a world brand until I read this post on SuperZiper (Brazilian site).
So apparently they are closing, which is sad... but on the bright side they are having a huge fire sale! For about €0.35 a piece (!), I went a little nuts and looted Daiso guiltlessly! Check it out, I even divided it in categories:
Stationary
Crafts
Needless to say, I was thrilled to see the many crafting items available at the shop.
Other Utilities
So thrilled with these! The whole lot above cost me about €13 (I couldn't resist going back another day and buying more stuff, but i didn't take more pictures) :)
So apparently they are closing, which is sad... but on the bright side they are having a huge fire sale! For about €0.35 a piece (!), I went a little nuts and looted Daiso guiltlessly! Check it out, I even divided it in categories:
Stationary
- Solid colors wrapping paper (too bad they didn't have more colors)
- Protective case for electronics
- A small triangle ruler set
- Very pretty little notebooks
- Oil Pastel box
- Some pens
- A wooden box I thought was nice because of the nail free joint system - Only when I got home and read the label I discovered this is a traditional measuring unit in Japan, called Masu. It was used to measure rice as a form of currency, and nowadays as a vessel for serving Sake, or dry condiments such as pepper, salt, and sugar at the table. I am not sure what mine is made of, but it smells great so it might well be Japanese Cypress.
Crafts
Needless to say, I was thrilled to see the many crafting items available at the shop.
- EVA foam sheet
- A leather-like perforated sheet
- A piece of fabric with a nice texture
- Polymer clay (Never used this! Seemed like a good opportunity to try)
- Acrylic webbing tape in some colors
- Eye buttons for dolls
- Velcro tape
- Wooden picture frames I intend to make some art for
Other Utilities
- Inflatable pillow (the striped one)
- Instant freeze pack - I thought you could reheat these and use them again, but it turns out it's a one time thing. You punch the bag and it freezes. Well, still gonna be useful I suppose, the one time.
- A mesh bag for travel or laundry (you can wash delicate things in there to protect them, or long things like shoe laces so they don't tangle on everything)
- A long, thin washcloth - you can hold on each end to wash your back, hehe
- Bottle opener
- Silicone sponge for shoes
- A simple brush (it was supposed to adhere to tiles or glass with a suction hook, but that didn't work out. Oh, well.)
- Some cables with hooks
- A silicone grip so you don't hurt your hand with heavy bags
- Hair elastic (you can cut it and tie, but i think I'm going to make a head band with mine)
- A drawstring bag (they had so many nice patterns, it was hard to choose just one)
- Zippered case with big polka dots
So thrilled with these! The whole lot above cost me about €13 (I couldn't resist going back another day and buying more stuff, but i didn't take more pictures) :)
26.3.13
Easter egg cartons
There's still time to spice up your Easter gifts or decoration. Here's a little tutorial i made on how to transform an egg carton using a pretty napkin.
Here's what you're gonna need:
- egg carton(s)
- decorative napkin
- glue
- i used a foam brush, but a regular brush will work as well.
Step 1
Remove the labels of the carton. See that little blue spot i missed? It showed a bit through my napkin, so you might want to avoid that.
Step 2
Cut your napkin so that there is enough paper to cover the whole lid of the carton and your motive is centered. Lay the napkin on the lid first to decide what will look good where.
Step 3
You can't see in the picture, but there is white glue diluted on water on the little plate. Spread this over the whole lid. The carton is very absorbent, so you might have to reapply as you continue to glue to napkin to it.
Step 4
Carefully lay the napkin on the lid and start to apply the glue on top of the napkin. It should be pretty soaked and it will get fragile, but if you accidentally rip it, just continue to glue it in the same way. It shouldn't be very visible once it's dry.
Step 5
For the "weirder" shapes of the box, you will just need a bit of patience and to keep applying the water+glue mixture. The napkin will bend and take the shape of the carton. You could also choose to apply the napkin only on the flat part of the lid, as i did on the bigger carton (more pictures ahead)
Step 6
Step 7
 Carefully rip out the excess napkin and glue the ends to the carton. On this box you can see i applied the napkin only on the flat part of the carton, so i ripped that edge too on this step.
Step 8
Let it dry and fill with eggs! =)
Now you have a cute way to give away eggs on Easter, and as a bonus they will be easy to transport.
If you use this tutorial, i would love to see some pictures of what you came up with!
Enjoy!
Here's what you're gonna need:
- egg carton(s)
- decorative napkin
- glue
- i used a foam brush, but a regular brush will work as well.
Step 1
Remove the labels of the carton. See that little blue spot i missed? It showed a bit through my napkin, so you might want to avoid that.
Step 2
Cut your napkin so that there is enough paper to cover the whole lid of the carton and your motive is centered. Lay the napkin on the lid first to decide what will look good where.
Step 3
You can't see in the picture, but there is white glue diluted on water on the little plate. Spread this over the whole lid. The carton is very absorbent, so you might have to reapply as you continue to glue to napkin to it.
Step 4
Carefully lay the napkin on the lid and start to apply the glue on top of the napkin. It should be pretty soaked and it will get fragile, but if you accidentally rip it, just continue to glue it in the same way. It shouldn't be very visible once it's dry.
Step 5
For the "weirder" shapes of the box, you will just need a bit of patience and to keep applying the water+glue mixture. The napkin will bend and take the shape of the carton. You could also choose to apply the napkin only on the flat part of the lid, as i did on the bigger carton (more pictures ahead)
Step 6
For the holes, just poke the napkin and work it with glue towards the inside of the lid, like so:
Step 7
 Carefully rip out the excess napkin and glue the ends to the carton. On this box you can see i applied the napkin only on the flat part of the carton, so i ripped that edge too on this step.
 Step 8
Let it dry and fill with eggs! =)
Now you have a cute way to give away eggs on Easter, and as a bonus they will be easy to transport.
If you use this tutorial, i would love to see some pictures of what you came up with!
Enjoy!
Subscribe to:
Posts (Atom)


